Unveiling the Secret to Bakery-Quality Cream Puffs at Home
Imagine indulging in a delicate French pastry, its golden exterior crisp, its interior airy and ready to be filled with the silkiest cream. What if we told you that achieving such bakery-quality cream puffs isn't just possible at home, but surprisingly straightforward? Far from being an intimidating challenge reserved for professional patissiers, these cloud-like delights are a testament to how simple ingredients can transform into something truly extraordinary with just a little attention to technique.
For many, the allure of French patisseries, with their exquisite displays of éclairs, croissants, and perfectly formed cream puffs, represents the pinnacle of baking artistry. The good news is, you don't need a trip to Paris to experience this culinary magic. This article will guide you through the process of creating irresistible homemade cream puffs that rival any pastry shop offering, balancing impressive presentation with an approachable technique perfect for both special occasions and weekend baking adventures. Get ready to impress yourself and your guests with these elegant French treats!
The Art and Science of Choux Pastry: Your Foundation for Perfect Puffs
The heart of any exceptional cream puff is its shell, crafted from what's known as pâte à choux, or choux pastry. This delicate dough is where the true "magic" happens, resulting in those signature hollow centers and crisp, golden exteriors. While the name might sound fancy, the process is incredibly forgiving, requiring no special skills beyond careful attention to detail.
The genius of choux pastry lies in a phenomenon called "temperature magic." When the dough, which has a high moisture content, is baked at a high initial temperature, the water rapidly turns into steam. This steam expands furiously within the dough, creating pressure that causes the pastry to puff up dramatically and hollow out from the inside. This scientific marvel is what gives cream puffs their unique structure – a perfectly engineered vessel just waiting for its delectable filling.
Understanding this process is key. The initial high heat provides the explosive lift, while a subsequent lower temperature baking phase helps to dry out the interior, preventing the puffs from collapsing and ensuring that coveted crisp exterior. Mastering this balance is essential for achieving the light, airy texture that defines a truly great cream puff.
Mastering the Ingredients: What Makes Your Cream Puffs Shine
The secret to perfect homemade cream puffs starts with understanding the role of each ingredient in both the choux pastry and the luscious filling. Quality ingredients, handled with the right technique, elevate simple components into extraordinary results.
- Unsalted Butter: This is the foundation of choux pastry, providing essential richness and contributing to the steam pockets. For the most luxurious texture and flavor, consider using a high-quality European-style butter with a higher fat content.
- Water & Whole Milk: The precise ratio of these liquids is critical for proper puff development. Water creates the essential steam for rise and hollowing, while whole milk adds richness, tenderness, and a lovely golden hue to the pastry that water alone cannot provide. Avoid substituting with lower-fat alternatives, as they won't deliver the same tender structure or vibrant color.
- Salt: A pinch of salt is vital, as it enhances all the other flavors in the pastry without making it taste overtly salty. Fine sea salt or kosher salt works beautifully.
- Sugar (for dough): A small amount of sugar promotes beautiful browning and adds a subtle sweetness to the pastry shells. This slight sweetness balances flavors, ensuring the shells aren't bland and allowing the filling's sweetness to truly shine.
- All-Purpose Flour: This provides the necessary structure for the pastry to hold its shape while remaining tender. For best and most consistent results, always measure flour by weight (typically 125g per cup) rather than volume. Unbleached all-purpose flour is generally preferred for its quality.
- Eggs (Room Temperature): Eggs are crucial for creating structure, enriching the dough, and contributing to that signature golden color. Using room temperature eggs is a small but mighty tip; they incorporate much more smoothly into the dough, resulting in a more uniform and stable emulsion. If your eggs are cold, simply place them in a bowl of warm water for 5-10 minutes to bring them up to temperature quickly.
Step-by-Step to Puffy Perfection: A Simplified Guide
Creating those impressive cream puffs involves a few distinct stages. While the full recipe involves precise measurements, here's a general overview of the process:
- Making the Panade: You'll start by combining butter, water, milk, sugar, and salt in a saucepan and bringing it to a rolling boil. Once boiling, remove it from the heat and vigorously stir in the flour all at once. Return the pan to medium heat, stirring constantly with a wooden spoon. This crucial step, known as drying out the dough or creating the "panade," cooks the flour and removes excess moisture. Continue stirring until the dough pulls away from the sides of the pan and forms a ball, and a thin film forms on the bottom of the pan – this indicates it's ready.
- Incorporating the Eggs: Transfer the warm dough to a stand mixer (or use a hand mixer). Let it cool slightly before adding the eggs one at a time, mixing thoroughly after each addition. The dough will look curdled at first, but keep mixing until each egg is fully incorporated and the dough returns to a smooth, glossy consistency. You're looking for a specific consistency: the dough should be thick enough to hold its shape but soft enough to pipe easily, often described as having a "V" shape when lifted with a spoon.
- Piping the Puffs: Transfer the choux pastry to a piping bag fitted with a round or star tip. Pipe uniform mounds onto a baking sheet lined with parchment paper. Consistency in size is important for even baking.
- Baking for Rise and Crispness: This is where the temperature magic truly shines. Start baking your cream puffs at a high temperature (e.g., 400°F/200°C) for the first 15-20 minutes. This initial blast of heat generates maximum steam, causing the puffs to rise dramatically and hollow out. Crucially, resist the urge to open the oven door during this phase! Any sudden drop in temperature can cause your delicate puffs to collapse. After the initial rise, reduce the oven temperature (e.g., to 350°F/175°C) and continue baking for another 20-30 minutes, or until the puffs are deeply golden brown, firm, and crisp. This lower temperature allows the interior to dry out completely, preventing sogginess.
- Cooling: Once baked, immediately transfer the cream puffs to a wire rack. This allows air to circulate around them, preventing condensation and keeping them crisp.
Beyond the Classic: Filling Ideas and Make-Ahead Magic
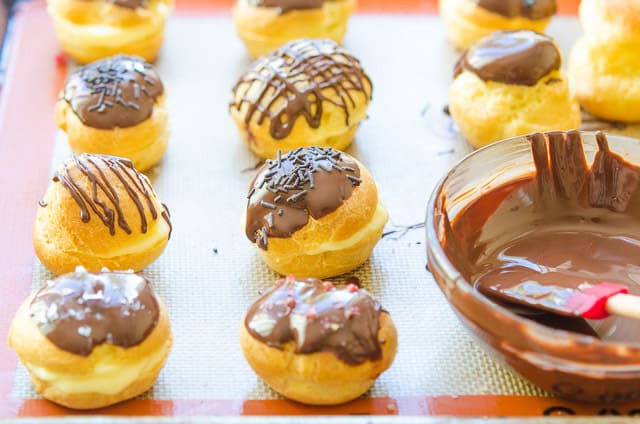
Once your beautiful choux pastry shells are cooled, they become a versatile canvas for countless filling possibilities. The traditional choice, of course, is a simple, sweetened whipped cream—a perfect complement to the airy, slightly savory pastry. A dusting of powdered sugar adds the final touch of elegance.
But the adventure doesn't have to end there! Explore more creative filling ideas and learn about making cream puffs ahead of time in our comprehensive guide! Beyond classic vanilla cream, these puffs welcome a world of flavors. Imagine them filled with rich chocolate pastry cream, an aromatic coffee-flavored whipped cream, a tangy lemon curd, or even seasonal fruit compotes. For those feeling particularly adventurous, choux pastry can even venture into savory territory, filled with creamy chicken salad or smoked salmon mousse, making for elegant appetizers.
Another fantastic advantage of homemade cream puffs is their make-ahead friendly nature. The unfilled pastry shells can be baked and frozen for up to a month. Simply store them in an airtight container or freezer bag. When unexpected guests arrive or a craving strikes, simply thaw them briefly, crisp them up in a warm oven for a few minutes, and then fill them. This makes classic cream puffs for beginners an even more approachable treat, allowing you to master the airy dough and then assemble them at your leisure.
This impressive yet approachable dessert allows for last-minute assembly, ensuring you always have a sophisticated treat ready to delight.
Conclusion: Your Journey to Homemade French Pastry Excellence
From basic pantry staples, you can conjure up sophisticated, bakery-quality cream puffs that are sure to impress. The journey of mastering choux pastry is not only rewarding but also incredibly satisfying, teaching you valuable pastry science along the way. With careful attention to ingredients and a few key techniques, you can transform simple butter, water, flour, and eggs into those irresistibly airy, golden shells that once seemed reserved for professional pastry chefs. So, don't delay – embrace the challenge, enjoy the process, and savor the ultimate treat of freshly baked, homemade French pastry. Your kitchen is about to become your favorite patisserie!
